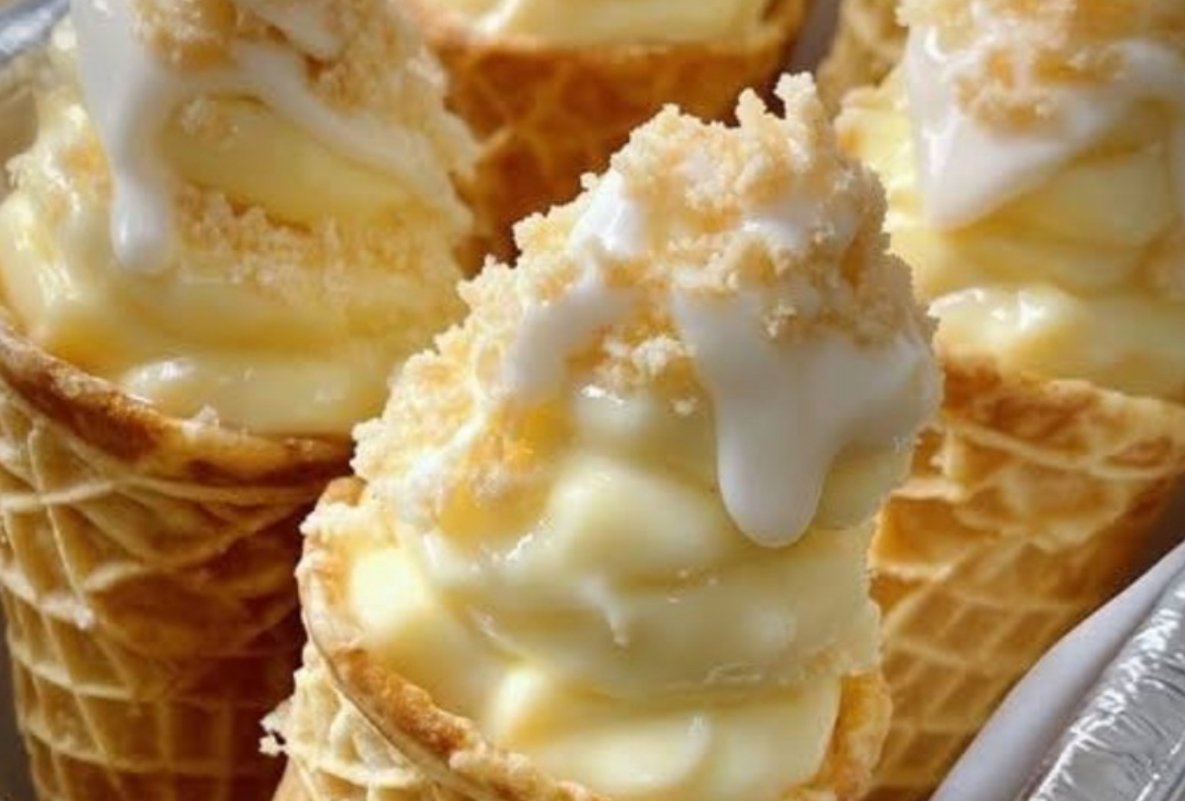
8 Steps to Make Banana Pudding Cheesecake Cones
If you love banana pudding and cheesecake, you’ll fall head over heels for these Banana Pudding Cheesecake Cones! This no-bake dessert combines creamy cheesecake filling, banana pudding, and crunchy vanilla wafers—all served in a waffle cone. Perfect for parties, summer gatherings, or anytime you want a unique sweet treat.
ADVERTISEMENT
Why You’ll Love This Dessert
Banana pudding cheesecake cones are not only delicious but also fun to eat. Instead of traditional bowls, the creamy filling is piped into cones, making them portable, Instagram-worthy, and perfect for sharing. They’re easy to prepare ahead of time and can be customized with toppings like caramel, whipped cream, or extra cookies.
The Secret to Creamy Cheesecake Cones
The key to getting the perfect filling is whipping the cream until soft peaks form and gently folding it into the cream cheese and pudding mixture. This creates a light, fluffy, yet rich texture that holds up well inside the cones without becoming runny.
When to Serve Banana Pudding Cheesecake Cones
These cones are ideal for birthday parties, cookouts, or family get-togethers. They’re especially great for warm-weather events since they’re no-bake and refreshing. You can even prep them in advance and keep them chilled until ready to serve.
Ingredients You’ll Need
For the Cheesecake Filling:
- 16 oz cream cheese, softened
- 1 cup powdered sugar
- ½ cup heavy whipping cream
- 1 tsp vanilla extract
- 1 package (3.4 oz) instant banana pudding mix
- 1 ½ cups cold milk
For the Cones:
- 10–12 waffle cones or sugar cones
- 1 cup crushed vanilla wafer cookies
- 2 Tbsp melted butter
For Garnish:
- Sliced bananas
- Whipped cream
- Crushed vanilla wafer cookies
- Caramel drizzle (optional)
Step-by-Step Instructions
Step 1: Beat the Cream Cheese
In a large bowl, beat cream cheese and powdered sugar until smooth and creamy.
Step 2: Whip the Cream
In a separate bowl, whip the heavy cream until soft peaks form. Fold into the cream cheese mixture.
Step 3: Prepare the Banana Pudding
Whisk banana pudding mix with cold milk until thickened (about 2–3 minutes).
Step 4: Combine the Mixtures
Gently fold the prepared pudding into the cream cheese mixture until smooth. Refrigerate while preparing cones.
Step 5: Make the Cookie Coating
Mix crushed vanilla wafer cookies with melted butter.
Step 6: Coat the Cones
Dip the top edges of cones in melted butter, then roll in crushed cookies. Let sit to set.
Step 7: Fill the Cones
Spoon or pipe the chilled banana cheesecake filling into cones.
Step 8: Garnish & Serve
Top with banana slices, whipped cream, crushed cookies, and caramel drizzle. Serve immediately.
Recipe Timing & Nutrition
- Prep Time: 25 minutes
- Chill Time: 20 minutes
- Total Time: 45 minutes
- Servings: 10–12 cones
Estimated Nutrition (per cone):
- Calories: ~310
- Carbohydrates: 36g
- Protein: 5g
- Fat: 16g
- Sugar: 24g
Banana Pudding Cheesecake Cones
1. Can I make these ahead of time?
Yes, prepare the filling and cones separately. Assemble just before serving so the cones don’t get soggy.
2. How do I keep the cones from getting soggy?
Coating the rims with crushed cookies helps protect them. You can also line the inside with melted chocolate for an extra barrier.
3. Can I use different pudding flavors?
Definitely! Try vanilla, chocolate, or even coconut pudding for a fun twist.
4. Can I make this recipe without cones?
Yes! Serve the filling in cups layered with crushed cookies and bananas for a parfait-style dessert.
5. How long does the filling last?
Store the cheesecake filling in an airtight container in the refrigerator for up to 3 days.